Wednesday, October 31, 2012

Hot Tamales (Miss-Mex! not Tex-Mex)


I have been eating tamales lately and have a semi-fondness for them. They look hard to make so I think I will be eating them instead of preparing them. I had some delicious ones at Fat Mama’s Tamales in Natchez this past week. They do not make them in the restaurant anymore but out-source them and bring them in frozen and cook them in boiling water as needed. At a wildlife festival this past weekend, I had some wild hog tamales. They were actually spicy and really good.

How did hot tamales get into Mississippi? Many think that tamales made their way to the Mississippi Delta in the early 20th century when migrant laborers were brought in from Mexico to work the cotton harvest. The basic tamale ingredients, cornmeal and pork, were easily adapted by the African Americans who shared the fields. Others say that the Delta’s history with tamales goes back to the U.S. Mexican War 100 years earlier, when soldiers from Mississippi traveled to Mexico and brought tamale recipes home with them.

Today, African Americans are the primary keepers of the tamale-making tradition in the Delta. Through slavery and sharecropping, tamales have proved to be a viable support system, financially and nutritionally, to rural communities throughout the area.

No two people make hot tamales exactly the same way. Pork is traditional, but some cooks use beef, while others prefer turkey. Some boil their meat, while others brown it. Some people use masa, while others prefer the rough texture of cornmeal. Most wrap in corn shucks, while a few have turned to parchment paper. Some season the tamale in just one way, while others will season the meat and the meal, as well as the water used to simmer the rolled bundles. Some eat theirs straight out of the shuck, while others smother them in chili and cheese. I do know that in the Delta tamales are served with crackers and a cold beer! Why crackers? Got me. I thought it was a mistake when we got a bowl of crackers with our tamales at Fat Mama’s.  I heard of one person who always eats hers with crackers and ranch dressing!

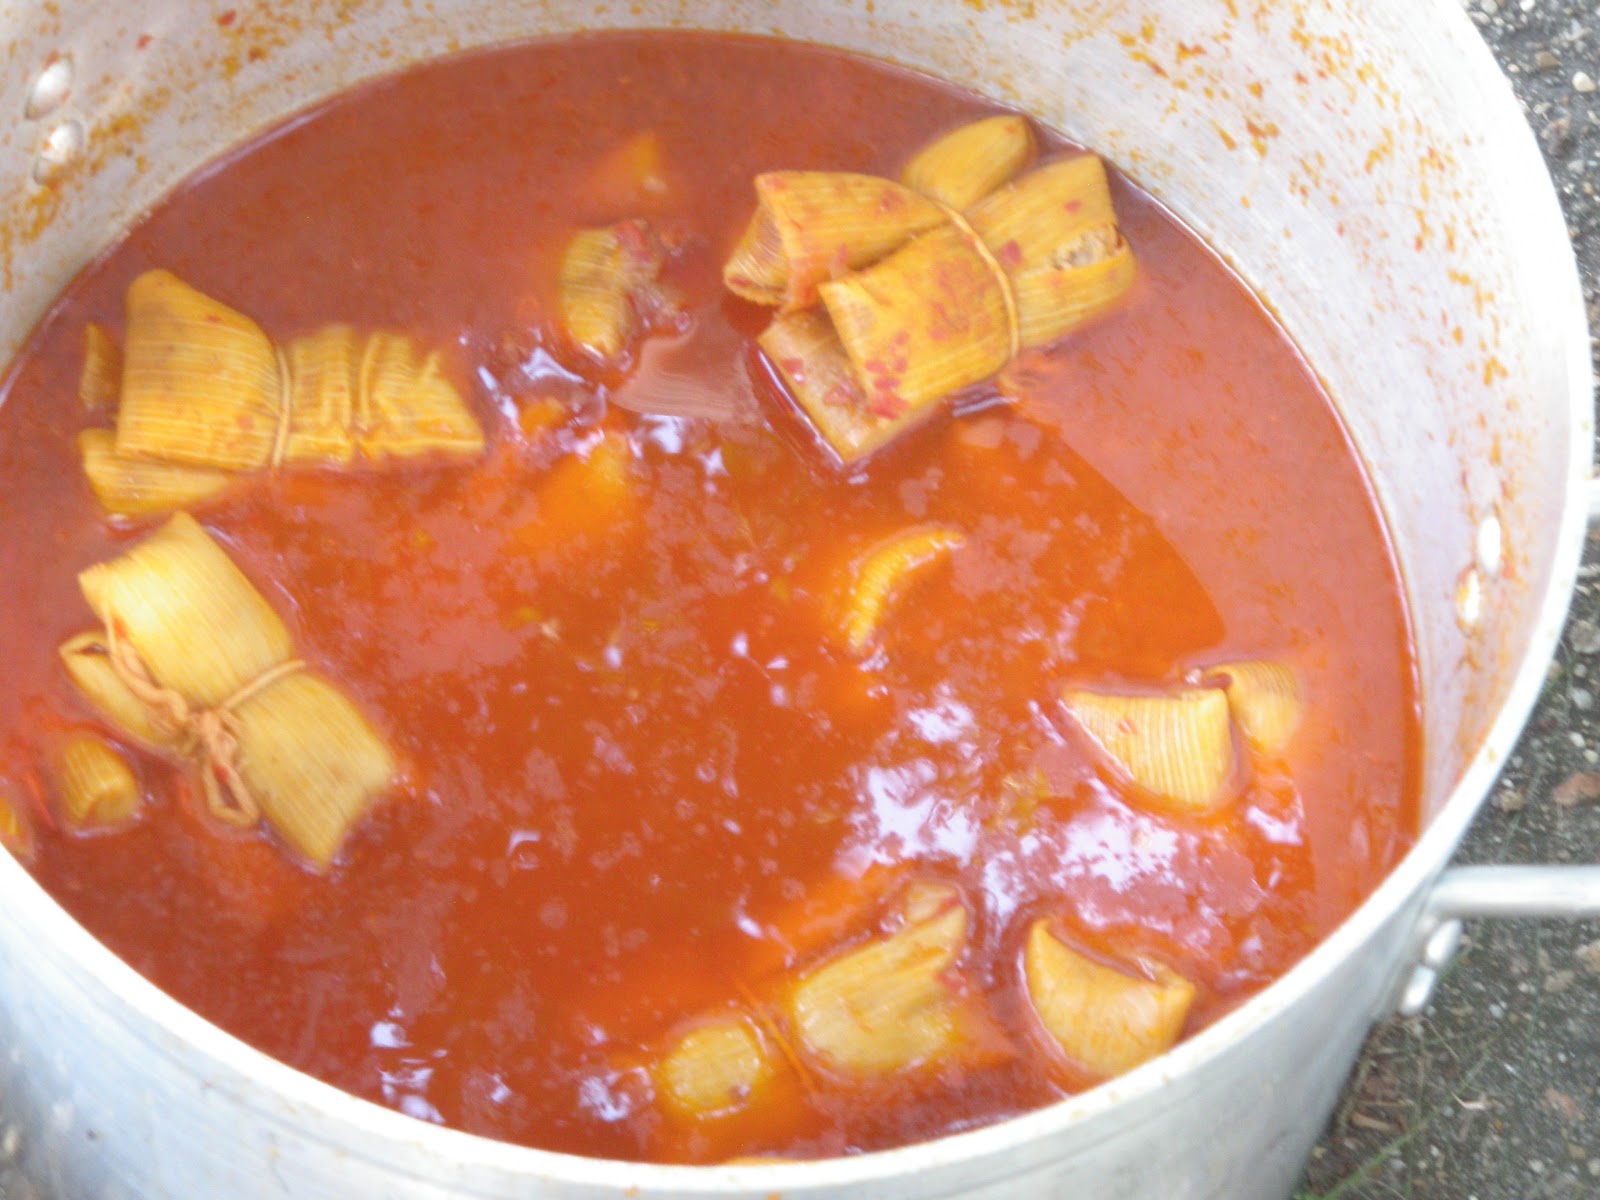
Many people say that the best time to eat hot tamales is during the winter months, but tamales are sold year round. The RED HOT TAMALES are in fact bright red in color. This visual is the result of spices added in all stages of tamale preparation and cooking.

Even though making tamales are time consuming, they perhaps are worth doing. Below are the steps in preparing tamales, so you can have this recipe on hand if you decide to make some. Fortunately they are readily available here in southwest Mississippi even though this is not the Delta.

Mississippi Delta Tamales

Makes 7-8 dozen (If you are going to the trouble, might as well make a few.  One can easily eat a dozen. They are usually sold by the dozen or half dozen.)

Meat Filling

6-8 lbs. boneless meat (pork shoulder, chuck roast, or chicken)

¾ cup vegetable oil

¼ cup chili powder

2 Tablespoons paprika

2 Tablespoons salt

2 teaspoons black pepper

1 teaspoon ground cayenne

1 Tablespoon onion powder

1 Tablespoon garlic powder

1 teaspoon ground cumin

Cut the meat into large chunks and place in a large, heavy pot. Cover in cold water. Bring to a boil over high heat. Cover the pot, and reduce heat to medium-low and simmer until meat is tender, 2-2 ½ hours. Remove the meat and reserve the cooking liquid. When the meat is cool enough to handle, remove and discard any skin and large chunks of fat. Shred or dice the meat into small pieces. There should be 10-12 cups of meat. Heat the vegetable oil over medium heat in a heavy pot. Stir in the chili powder, paprika, salt, pepper, cayenne, onion powder, garlic powder, and cumin. Add the meat and stir to coat with the oil and spices. Cook, stirring often, until the meat is warmed through, about 7-10 minutes. Set aside.

Corn Husks

While meat is cooking, soak the husks in a large bowl or sink of very warm water until they are softened and pliable, about 2 hours. Separate into single leaves, trying not to tear them. Wash off dust and discard any corn silks. Keep any husks that split to the side, since two small pieces can be overlapped and used as one.

Corn Meal Dough

8 cups yellow corn meal or masa mix (can be found in most stores)

4 teaspoons baking powder

2 teaspoons salt

 1 2/3 cups vegetable oil or lard

6-8 cups warm meat broth (from cooking of the meat)

Stir the corn meal, baking powder, salt and lard together in a large bowl until well blended. Gradually stir in enough warm liquid to make soft, spongy dough that is the consistency of mashed potatoes. The dough should be quite moist but not wet. Cover the bowl with a damp cloth.

Assembling the tamales:

Remove a corn husk from the water and pat dry. Lay husk on a work surface. Spread about ¼ cup of dough in an even layer across the wide end of the husk to within 1 inch of the edges. Spoon about 1 tablespoon of the meat mixture in a line down the center of the dough. Roll the husk so that the dough surrounds the filling and forms a cylinder or package. Fold the bottom under to close the bottom and complete the package. Place the completed tamales in a single layer on a baking sheet. Repeat until all dough and filling is used.

Cooking the tamales:

To simmer: Stand the tamales upright, closed side down, in a large pot. Place tamales together in the pot so that they do not fall down. Carefully fill the pot with enough water to come just to the top of the tamales, trying not to pour water directly in the tamales. Bring to a boil over high heat. Cover the pot, reduce heat to medium-low, and simmer until the dough is firm and pulls away from the husks easily and cleanly, about 1 hour.

To steam: Stand the tamales upright, closed side down, in a large steamer. Cover the tamales with a damp towel or additional husks. Steam the tamales over simmering water until the dough is firm and pulls easily from the husks, about 1-1 ¼ hours.

Serve tamales warm, in their husks. Remove husks to eat.


Sweet Potatoes 2012


We just received the October 15 ‘Mississippi Market Bulletin’ featuring sweet potatoes.  Sweet potatoes give Mississippi a number 2 national ranking with 22,500 acres in sweet potatoes (It’s nice to see Mississippi near the top of a list, rather than the bottom); North Carolina is first with 64,000 acres. Harvest started in August and was 46 percent harvested by late September. The majority of the state’s sweet potatoes are grown within 40 miles of Vardaman in Calhoun County in the northeastern part of the state. The bulletin notes that Americans now consume about 5.7 pounds of sweet potatoes per person each year.

All Southern states produce sweet potatoes commercially so they are readily available this time of year. And they are quite healthy: rich in fiber; fat and cholesterol free, large amounts of Vitamin C, a respectable dose of Vitamin E and A, and folic acid, iron, copper, calcium and beta-carotene; they also have anti-tumor, anti-HIV, anti-muscular dystrophy, antifungal, antibacterial, anti-hypertensive and ant-diabetic effects.  However, most people eat their sweet potatoes with an added dose of sugar which is not so healthy.

The market bulletin had a page of ‘sweet’ sweet potato recipes but my husband only wants to eat them in savory dishes.  And as we began our own harvest of sweet potatoes I found this savory Vietnamese soup recipe in Louisiana Cookin’. This soup is a winner. It won first prize as a main dish at a contest at Delgado Community College in New Orleans.

Sweet Potato Vietnamese Soup

Makes 4 servings

1 tablespoon canola oil

1 pound ground pork

1 small onion, finely chopped (about ½ cup)

¼ cup chopped fresh basil, divided (It’s still growing in pots on our patio.)

1 (3-inch) piece lemongrass (I finally got to use some of the lemon grass we have been growing for years.)

3 cloves garlic, minced

1 jalapeno pepper, chopped

2 teaspoons grated fresh ginger

2 teaspoons ground cumin

1 ½ teaspoons ground cardamom

¼ teaspoon ground nutmeg

2 sweet potatoes, peeled and cut into 1/2-inch cubes (about 2 cups)

1 quart chicken stock

1 (13.5-ounce) can light coconut milk

Garnish: chopped fresh cilantro, jalapeño pepper slices and basil

In large stockpot, heat oil over medium heat. Add pork, onion, 2 tablespoons basil, lemongrass, garlic, jalapeño, ginger, cumin, cardamom, and nutmeg. Cook until pork is browned and onion is soft, about 10 minutes.

Add sweet potatoes, chicken stock, and coconut milk. Bring to a simmer, cover and cook until sweet potatoes are tender, about 10 minutes. Uncover, remove lemongrass, and add salt and pepper to taste. Garnish with remaining basil, cilantro, and jalapeño. The soup gets better with standing and the second day I used small red Thai chilies as a garnish.

In the same magazine was a sweet potato side dish that was a winner also. Using sweet potatoes with macaroni sounds like a dish just made to savor.

Cheesy Sweet Potato Mac

Makes 8 servings

8 ounces macaroni (about 2 cups)

1 (15-ounce) can sweet potatoes (use fresh ones this time of year.)

2 tablespoons butter

2 tablespoons all-purpose flour

½ teaspoon salt

½ teaspoon ground black pepper

1 cup heavy whipping cream

1 cup whole milk

1 cup shredded fontina cheese

½ cup soft bread crumbs

½ cup grated Parmesan cheese

½ cup chopped pecans (Picking those up now also. This looks to be a good year for pecans here.)

1 tablespoon pecan oil

Preheat oven to 350 degrees. Cook pasta according to package directions, and drain. Return to pot, and add sweet potatoes.

In a large saucepan, melt butter over medium heat. Whisk in flour, salt, and pepper, and cook for 2 minutes. Whisk in cream and milk; cook, stirring frequently, until thickened, about 3 minutes. Stir in fontina ¼ cup at a time. Stir cheese sauce into pasta.

Transfer macaroni and cheese to a 2-quart baking dish. In a small bowl, combine bread crumbs, Parmesan, pecans, and oil; sprinkle over pasta.

Bake for 30 minutes or until bubbly and golden. Let stand 10 minutes before serving.


Tuesday, October 16, 2012

Biryani


Recently I had a party for my choir, sixteen people. What to cook for this crowd? I wanted to do something they do not get normally and I decided on biryani. What in the world is that? Biryanis are grand, festive casseroles in which partially cooked rice is layered over cooked meat. Orange saffron milk is dribbled over the top, thereby coloring some grains yellow while leaving others white. (But today even in India, saffron is so expensive they use yellow food coloring mixed with water). I used the food coloring also. Soaking the rice in salted water for 3-24 hours is a trick the Persians used to get the rice grains as white and as separate from each other as possible.


A biryani is a meal in itself but may be eaten with some accompanying dishes: a yogurt dish, a carrot salad, or tomatoes with ginger. I used all three to go with the biryani and made naan  (an Indian bread) and it was a wonderful meal. I did have a good Indian dessert with ground cardamom served over ice cream. So this choir had something to SING about!


A long recipe but worth it! I did it three times so it took most of the morning. I could have done with only two but I had some left over to freeze for a quick meal sometime when I need one.


From Madhur Jaffrey’s Indian Cooking

Serves 6-8.


15 oz. long grain rice

3½ pints plus 3 tablespoons plus 6½ pints water

About 3 tablespoons salt

1 teaspoon saffron threads (if using) or 2 teaspoons yellow food coloring and 2 teaspoons water for substitute

2 tablespoons warm milk (if using saffron) to mix

3 medium-sized onions, peeled

4 cloves garlic, peeled

¾ inch fresh ginger, peeled and coarsely chopped

4 tablespoons blanched, slivered almonds

13 tablespoons vegetable oil

4 tablespoons raisins

1 ½ lb. boned lamb from the shoulder (I used chuck from grass-fed beef)

8 oz. natural yogurt

5-6 cloves

½ teaspoon black peppercorns

½ teaspoon cardamom seeds

1 teaspoon cumin seeds

1 teaspoon coriander seeds

1 inch stick cinnamon stick

about 1/6 nutmeg

¼ cayenne pepper

1 oz. butter, cut into 8 pieces

3 hard-boiled eggs, peeled and at room temperature


Wash the rice in several changes of water. Drain it and put it in a large bowl. Add 3½  pints water and 1 tablespoon of the salt. Mix and soak for 3-24 hours.

Put the saffron threads (if using) in a small, heavy frying pan. Toss the threads until they turn a few shades darker. Crumble them into the warm milk and soak for three hours.


Cut 2 of the onions in half, lengthwise, and then cut the halves into fine half-rings. Set these aside. Chop the remaining onion very coarsely. Put this chopped onion, garlic, 2 tablespoons of the almonds and 3 tablespoons water into the container of an electric blender. Blend until you have a paste.


Put 6 tablespoons of the oil in a 10-inch skillet, preferably nonstick, and set over medium-high heat. When hot, put in the onion half-rings. Stir and fry them until they are brown and crisp. Remove them with a slotted spoon and spread them out on a plate lined with paper towels.


Put the raisins into the same oil. Remove them as soon as they turn plump--which happens immediately. Put the raisins in another plate lined with a paper towel. Put the remaining 2 tablespoons almonds into the oil. Stir and fry them until they are golden. Remove them with a slotted spoon and spread them out beside the raisins. Set aside for use as the garnish.


Now, put the meat cubes, a few at a time, into the same hot oil and brown them on all sides. As each batch gets done, put in a bowl.


Add the remaining 7 tablespoons of the oil to the frying pan and turn heat to medium. When hot, put in the onion-garlic-ginger-almond paste from the blender. Fry, stirring all the time, until the paste turns a medium-brown color. If it sticks slightly to the bottom of the pan, sprinkle a little water and keep stirring. Return the meat and any accumulated juices to the pan. Add the yogurt, 1 tablespoon at a time, stirring well between each addition. Now put in 1¼  teaspoons of the salt and 5 oz. of water. Mix and bring to a simmer. Cover, turn heat to low and simmer for 30 minutes.


While the meat is cooking, put the cloves, peppercorns, cardamom seeds, cumin seeds, cinnamon and nutmeg into the container of a spice-grinder or a coffee-grinder. Grind finely.


When the meat has cooked for 30 minutes, add all the spices from the spice-grinder as well as the cayenne and mix well. Cover again and continue to cook on low heat for another 30 minutes. Remove cover, raise heat to medium, and cook stirring all the time until you have about 7 oz. thick sauce left at the bottom of the pan. The meat should be pretty well cooked by now.


Spread out the meat and sauce in the bottom of a heavy casserole. Cover and keep warm.


Pre-heat the oven to 300°F.


Bring 6 pints water to a rolling boil in a large pan. Add 1 ½ tablespoons salt to it. Drain the rice and rinse it off under running water. Slowly, scatter the rice into the boiling water. Bring to a boil again and boil rapidly for exactly 6 minutes. Then drain the rice.


Work fast now. Put the rice on top of the meat, piling it up in the shape of a hill. Take a chopstick or the handle of a long spoon and make a ½ inch wide hole going down like a well from the peak of the rice hill to its bottom. Dribble the saffron or food coloring in streaks along the sides of the hill. Lay the pieces of butter on the sides of the hill and scatter 2 tablespoons of the browned onions over it as well. Cover first with aluminum foil, sealing the edges well, and then with a lid. Bake in the oven for 1 hour. Remove from the oven.


Just before serving, quarter the eggs, lengthwise. Mix the contents of the rice pan gently. Serve the rice on a warmed platter, garnished with the eggs, remaining browned onions, raisins, and almonds.


South Indian Vegetables


The summer vegetables are coming to an end and some fall vegetables are making their way forward. My husband brought in some butternut squash, some more green beans, and some curry leaves. So the search began for what to do with these. Of course, Indian curry comes to my mind and with just a few extra spices and some more vegetables you have a wonderful meal with a great combination of flavors.

The September issue of Food and Wine had a nice section on south Indian food and that just suited what I wanted to cook. The use of coconut milk is common is south Indian cooking and one can find coconut milk in all the stores now. From ‘‘Food and Wine,” September, 2012.

Keralan Vegetable Stew

4 servings

2 tablespoons canola oil

2 tablespoons finely julienned peeled fresh ginger

4 garlic cloves, thinly sliced

12 fresh curry leaves or 2 bay leaves (There is nothing like the flavor of curry leaves but they are unavailable for most people.)

2 serrano chilies, finely chopped

1 teaspoon ground turmeric

Coarsely ground black pepper

1 cup frozen pearl onions, thawed (I used regular onions)

Salt

1 medium Yukon Gold potato, peeled and cut into 1-inch cubes

2 medium carrots, cut into ½ -inch dice

½ pound green beans, cut into ½-inch pieces

½ cup vegetable stock or broth

1 cup unsweetened coconut milk

In a large saucepan, heat the canola oil.  Add the ginger, garlic, curry leaves, chopped chilies, turmeric, 1½ teaspoons of black pepper and ½ cup of the pearl onions. Season with salt and cook over moderate heat, stirring occasionally, until the onions are softened, about 8 minutes. Add the potato cubes, diced carrots, green beans, vegetable stock and the remaining ½ cup of pearl onions and bring to a boil.

Add the coconut milk and simmer partially covered, until the vegetables are tender and the coconut milk is slightly reduced, about 30 minutes. Season with salt and black pepper. Discard the bay leaves, if using and serve with rice.

This is a wonderful use of butternut squash and a colorful dish to serve with your vegetable curry.

Butternut Squash Basmati Rice

4-5 servings

1 tablespoon unsalted butter

1 teaspoon whole cumin seeds

1 teaspoon mustard seeds

1 cup basmati rice

¾ pound peeled butternut squash, cut into ½-inch dice (2 cups)

2 cups water

2 teaspoons kosher salt

In a medium saucepan, melt the butter. Add the cumin and mustard seeds and cook over high heat until the mustard seeds begin to pop, about 30 seconds. Add the rice and diced squash and stir to coat with the butter. Add the water and salt and bring to a boil. Cover and cook over very low heat until the squash is tender and the water is completely absorbed about 15 minutes. Remove from the heat and let the rice stand covered for 5 minutes. Fluff the rice with a fork and serve right away.

This meal was so good and healthy. It took a small amount of time to get together and was good for two meals. Give it a try!


Memphis and Lemon Pie


We have been on the road again and this time to Memphis to see Graceland and to Tupelo to visit the birthplace of Elvis. We took my sister and her son on this trip and really thought we would not enjoy it as much as we did. This year was the 35th anniversary of Elvis’s death and we missed the anniversary by a week. Lucky for us since so many people do come for that specific time. Elvis was the “King” and when you see him entertaining in his prime he was just so good!


Elvis was born in a two-room house in Tupelo. It was very small and you can see how poor his family had been so the move was made to Memphis when he was 12. Elvis learned to sing in his church choir at an early age, and the church is on the museum property at this point in time and it was strange to think that Elvis sang is this church. If you have time go to Tupelo and visit the Elvis museum, home, and church. It is worth the trip. Tupelo has done a great job on their restorations and museum building and exhibits.


Our first food event was lunch (probably better termed ‘dinner’) at The Cupboard, a famous old restaurant at 1400 Union Ave. in downtown Memphis. We had heard about it on NPR from The Stern’s on The Splendid Table. They were raving about it because of the lemon pie. The Cupboard, which has been around for 70 years, is a restaurant for the locals with a meat and three sides. If you want Southern food this is the place to go. You can get fried chicken, fried fish, and a host of vegetable options, eggplant casserole, fried green tomatoes (my favorite), broccoli casserole, greens, beans, mashed potatoes, and of course there is that lemon pie. I saved a little room for dessert and I will say the lemon pie was the best of all. I read that the lady who makes the pies only uses real lemon juice and 2 eggs for each pie. They do use sweetened condensed milk, although the cookbook recipe, available for sale at the restaurant, does not.


The afternoon was spent at Graceland.  It should be on your to see list.


While in Memphis, we did see the ducks at the old Peabody Hotel and went to the famous old restaurant The Rendezvous in a basement nearby. We did not have their famous dry or wet ribs (still full from the Cupboard), but just a really fabulous barbecue sandwich. Tupelo had one restaurant that everyone seemed to know about called The Grille. We did have a good sandwich and garlic fries for lunch the next day. I wanted to try their Hershey Pie, but just not enough room.


I decided to make a lemon pie like the one at The Cupboard and got out my cookbook, Screen Doors and Sweet Tea, by Martha Hall Foose.  Her recipe was very similar to the one in The Cupboard Cookbook (one I did not buy but looked at the recipe). I did find some information about sweetened condensed milk. Prior to refrigeration, there was no way to safely keep milk for more than a few hours. Gail Borden used vacuum pans to condense fresh milk by evaporation over 60 percent of the water and sweetening the residue. After several failed attempts, he was granted a patent in l854 for his new product, shelf-stable milk. It fueled the Union troops during the War Between the States. Borden’s

plants in New York, Connecticut, and Maine were commandeered to supply milk for the troops. However, Gail Borden lived in Liberty, Mississippi, just down the road from us and that is where he developed the condensed milk.


Lemon Icebox Pie


Makes one 9-inch pie


1 ½ cups graham cracker crumbs

¼ cup granulated sugar

½ teaspoon ground cinnamon

½ cup (1 stick) unsalted butter melted

2 (14-ounce) cans sweetened condensed milk

4 large egg yolks (The Cupboard only uses 2 egg yolks)

1 teaspoon grated lemon zest

½ cup fresh lemon juice

2 cups heavy cream

6 tablespoons confectioners’ sugar


Preheat the oven to 350ºF.


In a medium bowl, combine the crumbs, granulated sugar, cinnamon, and melted butter. Pat into a 9-inch deep-dish pie pan and bake for 6 to 8 minutes, or until slightly browned. Remove to a wire rack to cool.


Meanwhile, in a large bowl, whisk together the milk, yolks, lemon zest, and lemon juice. Pour the lemon filling into the cooled crust. Bake for 10 minutes, until set. Cool on a rack. Chill the pie for 30 minutes.


When the pie is completely cooled, whip the cream with the confectioners’ sugar until stiff peaks form. Mound the whipped cream on top of the pie and chill for 1 hour.


If you prefer a meringue topping:

Preheat the oven to 425ºF.


Topping:

4 large egg whites

¼ teaspoon cream of tartar

5 tablespoons sugar

½ teaspoon vanilla extract


Whip the egg whites in an electric mixer on medium speed until frothy. Add the cream of tartar and slowly increase the speed as the egg whites become opaque. Add the sugar, one tablespoon at a time. Add the vanilla extract. Whip until the whites form a soft peak. Spoon the meringue over the warm pie.


Bake for 4 minutes, or until the meringue is puffed and brown. Cool on a rack for 20 minutes, and then refrigerate for 2 hours---or until you can’t stand it anymore.


Devon


Last week we attended the 5th annual North American Devon conference and sale, this year in Richfield Springs, New York—a charming Victorian village with hills and rolling pastures nearby. No by-pass diverts the driver from the main street.  It was cold on Saturday and we needed our winter coats.

Devon cattle are the oldest breed.  They were noted in Britain in 23 BC.  The first Devon in America consisted of 3 cows and a bull brought to the Massachusetts Bay Colony in 1623 on the ship Charity.  Though they were popular as an all-purpose breed (milk, oxen, and meat) for a long time they began to fade out as cattle began to be shipped off to feed lots.  They became a rare breed but are making a comeback as people are learning of the health benefits of grass-fed beef.

I’ve talked about grass-fed beef before and the Devon folks believe that Devon is best on grass.  Everyone knows “Certified Angus.”  There is now “Certified Devon Beef.”  You probably can’t find any.  I think we are the only owners of Devon cows in Mississippi.  I know of one producer in northern Alabama. Most Devon and Devon X beef is sold off farm to the locals.  I picked up a flier noting “Certified Devon Beef” is 100% grass fed, 100% antibiotic free, 100% hormone free and 100% humane management. One ranch in Virginia noted their “Certified Devon Beef” has ½ the saturated fat and 4 times the beta carotene and vitamin E.  CDB is rich in omega 3 fatty acids and conjugated linoleic acid.

If you can’t find Devon at least try to buy grass fed.  If you are going to eat beef, eat healthy beef.  And grass fed can be just as tender as grain finished beef if harvested at the right time.  Some people claim that grass-fed tastes different as well.  Last year I found one study in Australia comparing grain finished and grass finished beef.  The younger tasters noted that the grass-fed beef tasted beefier.  We have been eating factory raised beef, pork and chicken so long that we don’t know how the real thing tastes.

The best lecturer at the conference was Dr. Gregg Renfrow from the University of Kentucky.  He is a professor and a meat scientist---and a butcher.  He talked about cooking the tender cuts from the muscles of support vs. the less tender cuts from the muscles of locomotion which should be cooked slow and low (225 or less).  He also noted some new cuts.  The flat iron steak is the most popular new cut and one of the more tender cuts in the entire carcass.  This is the rotator cuff and not exercised in the cow.  He noted the chuck roast can be cut into chuck eye steak and is much cheaper.  Another factor besides the type of muscle or the way the muscle is cut that affects tenderness is aging.  Dry aged is better but costs more as the dehydrated muscle must be cut off and therefore there is less meat to sell.  Stores usually sell wet aged.  The type of grass affects the flavor as well, and handling of the animal before slaughter can harm the meat.  Unless we are buying off farm from a producer that we know, we are not likely to know about these factors in the grocery store meat but grass-fed and organic are becoming more available. 

90% of US shoppers buy their meat either at the supermarket or at a warehouse club.  “That means that the vast majority of meat is bought through a veil of cellophane, its origins obscured by a label that withholds far more information than it discloses. And it is bought without any personal contact with an expert who might illuminate us further.” This according to Hugh Fearnley-Whittingstall in The River Cottage Meat Book.  I noted he also says that Devon “produce the best beef I’ve ever tasted.”

I couldn’t help but think it odd that at this beef conference the first meal was chicken, the next pork.  Not till the last day did we have beef in the form of hamburgers.

Since grass-fed beef is more expensive I often just buy the grass-fed ground beef.  We ate at an old restaurant, The Southern Inn, in Lexington, Virginia on our way back home.  We had the meat loaf made with a combination of ground beef, veal, and pork and when I got home I found a good recipe for just that in the new ‘Food Network Magazine.’

1770 House Meatloaf (from the restaurant of the same name in East Hampton, NY.)

Serves 6-8 

2 tablespoons good olive oil

2 cups chopped Spanish onion (1 large)

1 pound grass-fed beef

1 pound ground veal

1 pound ground pork (pastured is healthier but hard to find)

1 tablespoon chopped flat-leaf parsley

1 tablespoon chopped fresh thyme leaves

1 tablespoon chopped fresh chives

3 extra-large eggs, lightly beaten

2/3 cups whole milk

2 tablespoons kosher salt

1 tablespoon freshly ground black pepper

2 ½ cups panko (Japanese bread flakes)

Garlic Sauce (recipe follows)

Preheat the oven to 350F.

Heat the olive oil in a large (12-inch) sauté pan over medium heat. Add the onion and celery and cook for 5 to 7 minutes, stirring occasionally, until the onion is translucent but not browned. Set aside to cool slightly.

Place the beef, veal, pork, parsley, thyme, chives, eggs, milk, salt and pepper in a large mixing bowl. Put the panko in a food processor fitted with the steel blade and process until the panko is finely ground,

Add the onion mixture and the panko to the meat mixture. With clean hands, gently toss the mixture together, making sure it’s combined but not compacted.

Place a piece of parchment paper on a sheet pan. Pat the meat into a flat rectangle and then press the sides in until it forms a cylinder down the middle of the pan (this will ensure no air pockets). Bake for 40 to 50 minutes, until a thermometer inserted in the middle reads 155 to 160. Remove from the oven and allow to rest for 10 minutes. Slice and serve hot with the Garlic Sauce.

Garlic Sauce

¾ cup good olive oil

10 garlic cloves, peeled

2 cups chicken stock, preferably homemade

3 tablespoons unsalted butter, at room temperature

Kosher salt and freshly ground black pepper

Combine the oil and garlic in a small saucepan and bring to a boil. Lower the heat and simmer for 10 to 15 minutes, until lightly browned. Be careful not to burn the garlic or it will be bitter. Remove the garlic from the oil and set aside. (I saved the oil for vinaigrettes.)

Combine the chicken stock, butter and cooked garlic in a medium saucepan and bring to a boil. Lower the heat and cook at full boil for 35 to 40 minutes, until slightly thickened. Mash the garlic with a fork, whisk in ½ teaspoon salt and ¼ teaspoon pepper, and taste for seasonings. Spoon the warm sauce over the meatloaf.

Butter Beans


Butter beans are my favorite bean but they are not readily available in the grocery.  We grow ours and they are still producing in the late fall.  We grow the large speckled calico, a pole lima.  We are fortunate enough to have some permanent metal poles with fencing and they work great for these prolific vines.  The vines would make a good arbor cover. Nice cover and edible too. Some people prefer the smaller white limas and Henderson bush (1889) is a popular bush lima and comes in earlier.

At one time, hundreds of different shell beans grew in the South. Perhaps the most lauded are the butter beans.  They can be speckled, green or white.  The name “butter bean” is relatively recent. “When properly cooked the beans melt in your mouth into creamy, buttery goodness--thus the name butter beans,” says Sheri Castle in the New Southern Garden Cookbook.

I recently obtained a copy of A Rich Spot of Earth about Thomas Jefferson’s revolutionary garden at Monticello by Peter Hatch, the director of gardens and grounds at Monticello since 1977.  He discusses the vegetables grown and provides a great history of the different vegetables in early America and cultivation techniques as well. The title of the lima bean section is “The New Southern Cuisine.” Lima beans were a hot weather favorite of Jefferson and among the most conspicuous vegetables in the garden during the steamy, late-summer months.  Lima beans are native to South America but were grown by Virginia Indians.  They were known as bushel, sugar or butter beans and Jefferson even called them honey beans.  Jefferson grew a smaller and more tender lima, the Carolina White. A larger sort was obtained from a Capt. Hilton of Jamaica and was the chief type planted in his retirement garden.  Mary Randolph recommended boiling young lima beans until tender, then serving them in a “boat” of melted butter. A frequently mentioned Monticello recipe was for Spanish olla, a spicy version of Brunswick stew which called for lima beans blended with other vegetables and chicken, pork, or beef.

Lima beans are a distinctly American product, suited to the warmth of the Southern summer and difficult to successfully grow in the north.

Frank Stitt in his Southern Table notes that butter beans are highly prized in the South.  He says the speckled butter beans may look prettier at the market but their flavor is not nearly as fine as that of the green ones. “When picked young and cooked soon afterward, butter beans have a delicacy to be treasured.”

From Frank Stitt’s cookbook, Southern Table

Butter Beans

Serves 8-10 as a side dish

6 cups water

1 onion, quartered

1 bay leaf

4 thyme sprigs, plus a scattering for garnish

4 savory sprigs, plus a scattering of leaves for garnish

Kosher salt

1 pound small green butter beans, picked over and rinsed

2 tablespoons fruity extra virgin olive oil, bacon fat, or unsalted butter, melted

Freshly cracked black pepper

Combine the water, onion, herbs, and salt in a medium saucepan and bring to a boil. Reduce the heat to a simmer and cook gently for 15 minutes. Add the beans, adjust the heat to maintain a simmer, and cook until the beans are just tender, 15-20 minutes. Taste for seasoning, and add salt if necessary. Remove the pan from the heat and let the beans rest in their liquid for 10 minutes.

Serve sprinkled with the herbs and drizzled with olive oil. Finish with cracked black pepper.

Sheri Castle in her cookbook, The New Southern Garden Cookbook, has a recipe for creamed butter beans. She tells in her comments that if she falls seriously ill she wants her loved ones to bring her a bowl of these divine butter beans and lift them to her lips in a silver spoon. They are her favorite bean also.

Creamed Butter Beans

Makes 6 servings

3 cups freshly shelled butter beans

Kosher salt, to taste

1 cup crème fraîche

1 teaspoon coarsely ground black pepper

1 tablespoon chopped fresh thyme

Thoroughly rinse the beans in several changes of water until the water stays clear, discarding any bits of leaves, hulls, or vine. Place the beans in a large, heavy saucepan and cover with cold water to a depth of 1 inch. Add ½ teaspoon kosher salt per cup of water. Bring to a boil and skim off the foam. (You might need to skim once or twice more during cooking. The foam comes from the natural sugars and proteins in the beans.) Reduce the heat and simmer gently until the beans are tender but not mushy or breaking apart, 15-30 minutes, depending on their freshness.

Remove from the heat and taste one of the beans. If needed, stir in more salt. Set the beans aside for at least 15 minutes to give them time to absorb the salt. Drain and return the beans to the pan.

Add the crème fraîche and stir until it melts, enrobing the beans and creating a wonderful sauce. Generously season the beans with lots of black pepper and more salt, if needed. Stir in the thyme and serve warm.

Tuesday, October 9, 2012

Wayside Inn


We began our two day journey to the North American Devon Association Meeting in New York by spending the first day driving up the Shenandoah Valley through Virginia. The leaves had not begun to turn but the drive was lovely with the Blue Ridge Mountains all around us.

We are always on the lookout for an interesting place to eat and found one in Middletown, Virginia, right at the crossroads of Rt. 11 and 1-81. This was the Wayside Inn which was proud to say it was the oldest continuously operating Inn in America. The tradition went back over 210 years for fine food and lodging. It was a nicely restored 18th Century Inn nestled in the Shenandoah Valley. It was in 1797 that the first travelers came to the Inn, stopping for food and lodging on their journey through the Shenandoah Valley. Known then as the Wilkerson Tavern, the Inn remained a popular spot for rest and refreshment into the 19th Century, when it became a relay station for stagecoaches.

During the Civil War, soldiers from both the North and South sought refuge and friendship at the Inn. And because the Inn served both sides in this conflict, it was spared the ravages of war. After the Civil War, Jacob Larrick bought the Inn and changed its name to Larrick’s Hotel. In the early 1900’s, the Inn was sold to Samuel Rhodes who added a third floor, wings on each side, and a new name, the Wayside Inn.

In the 1960’s, Leo Bernstein, a Washington, DC, financier and collector with a love for Americana, bought the Inn and meticulously restored and refurbished it. The Inn was purchased in 2009 by Jacob and Lois Charon and became the first new innkeepers in over 50 years.

We arrived around lunch time and the charming owner greeted us but I do have to say we were the only guests. It’s a tiny village and I think they do more events than week day lunches. The Inn was dark, a nice place for the evening, but lunch on that sunny day needed to be in another room with windows. We were asked if we would like spoon bread, since it needed twenty minutes to cook (you needed to order ahead of time) and of course we said yes. They were famous for their chicken pot pie and peanut soup. Of course we tried both. Some Food Network star was working on a book on Inns so they had their recipes for spoon bread and peanut soup ready. I felt lucky since they were willing to give them to me. No recipe for the chicken pot pie! A recipe they had used for six generations, they said. The vegetables tasted like frozen vegetables anyway, so I got the best recipes. I am not putting down the restaurant since I thought the soup and spoon bread was delicious. This place is worth a stop if in the area.

Wayside Inn Peanut Soup

Makes 6 servings

3 ½ cups chicken stock or two 14 ½ oz. cans chicken broth

1 stalk celery, finely diced

1 medium carrot, finely diced

1 small onion, finely chopped

1 cup creamy peanut butter

13 oz. can evaporated milk or light cream

Dash sugar

In large saucepan sauté celery, carrot, and onion until tender. (Recipe does not say what to sauté with so I used 1 tablespoon of butter---olive oil would be fine also). Add stock, bring to a boil and reduce heat. Gradually add peanut butter, stirring constantly. (Mixture will stiffen at first, but will become smooth.)

Add evaporated milk and a dash of sugar. Heat through, but do not boil. Strain, discarding vegetables.

I added some chopped peanuts on top for decoration as they had in the restaurant.


Spoon Bread

Makes 6 servings

1-Quart milk (I used Whole milk)

3 tablespoons sugar

1 ¼ cup corn meal

3 eggs (separated)


Bring milk to a boil with butter and sugar. Meanwhile, separate 3 eggs and whip the whites until stiff. Add cornmeal to the milk; cook 3 minutes, stirring constantly until quite stiff. Allow to cool. Fold in whipped whites and bake at 400 degrees in a shallow casserole dish until souffléd and lightly browned. Approximately 20-30 minutes.  It should be served immediately but tastes good even later.


Saveur 101


If you usually don’t buy cooking magazines, this month’s issue of ‘Saveur’ Magazine is worth buying. In honor of their 150th issue they did a collector’s edition of 101 classic recipes for their October issue. The recipes are fabulous and I could not decide which ones to do. The recipes are as diverse as Tex-Mex enchiladas to French blanquette de veau. The recipes are timeless and speak to the scope of the magazine which first was published in 1994. Twenty-five of these recipes have appeared in previous issues in the Classic column and it was a pleasure to see some of these recipes again. The magazine has 101 recipes but the other 49 classic recipes can be viewed on line at saveur.com.

I decided to do chicken with 40 cloves of garlic. I had not done this recipe in years and had the garlic on hand so decided to go with it. You can use up to 100 cloves of garlic but who has time to peel 100 cloves? The garlic cooks so long it melts and the flavor is delicious.

Chicken with 40 Cloves of Garlic

Serves 6-8

3 tbsp. olive oil

1 3-4-lb. chicken, cut into 8 pieces (I used 10 skinless, boneless chicken thighs)

Kosher salt and black pepper, to taste

40 cloves garlic, peeled

½ cup dry vermouth

¾ cup chicken stock

1 tbsp. chopped tarragon (It is hard to grow in our climate but we still had some in the garden.)

Heat oven to 350 degrees. Heat oil in a 6-qt. Dutch oven over medium-high heat. Season chicken with salt and pepper; add to pot and cook, turning once, until browned, about 15 minutes. Transfer to a 8”x8” baking dish; set aside. Add garlic to pot; cook until browned in spots, about 6 minutes. Add vermouth; cook, scraping bottom of pot, until slightly reduced, about 2 minutes. Add stock; boil. Transfer ¼ of the garlic to baking dish; mash remaining into stock. Pour over chicken; bake until chicken is glazed and tender, 15-20 minutes. Garnish with tarragon.

A favorite spaghetti recipe of mine is spaghetti carbonara. I was not surprised to see it in the top 101. Real Roman spaghetti carbonara is pasta, whole eggs, pancetta or (cured pork jowl), pecorino romano cheese, never cream. It can be enjoyed at any time!

Spaghetti Carbonara

Serves 4.

3 tbsp. extra-virgin olive oil

4 cloves garlic, peeled and crushed

10 oz. pancetta, cut into ½” long x 1/4” square strips

2/3 cup white wine

1 lb. dried spaghetti

2/3 cup finely grated Parmesan

¼ cup finely grated pecorino Romano

2 tbsp. finely chopped parsley

2 eggs

Kosher salt and freshly ground black pepper to taste

Heat oil in a 12” skillet over medium-high heat. Add garlic, and cook until golden, about 1 minute. Remove and discard garlic. Add pancetta, and cook until edges are crisp, about 6 minutes. Add wine, and cook until thickened, about 3 minutes. Remove from heat.

Bring a pot of salted water to a boil. Add spaghetti, and cook until al dente, about 7 minutes. Drain, reserving ¼ cup pasta water. In a large bowl, whisk together Parmesan, pecorino, parsley, and eggs; while whisking constantly, slowly drizzle in reserved pasta water until smooth. Add spaghetti along with reserved pancetta mixture. Season with salt and a generous amount of pepper. Toss to combine, and serve immediately.

The ultimate of all the French desserts to take hold of the American culinary imagination might be the chocolate mousse. This is a simple yet sophisticated dessert. It is hard to get it wrong so it is the foolproof final to an elegant meal. I did it for weekend guests who could not come at the last minute so we had to eat it all. Not a problem. My husband loved it!

Chocolate Mousse

Serves 6

1 2/3 cups heavy cream

2 tsp. vanilla extract

½ tsp. kosher salt

½ cup sugar

6 oz. bittersweet chocolate, melted and cooled

Chocolate shavings, to garnish

In a large bowl, beat cream, vanilla, and salt with a whisk until stiff peaks form; chill. In another large bowl, beat egg whites with a whisk until soft peaks form. While whisking, slowly add sugar, and continue beating until stiff peaks form. Add melted chocolate to egg whites, and fold until almost incorporated; add whipped cream and fold until completely incorporated. Divide among serving cups; chill. Sprinkle with chocolate shavings before serving.